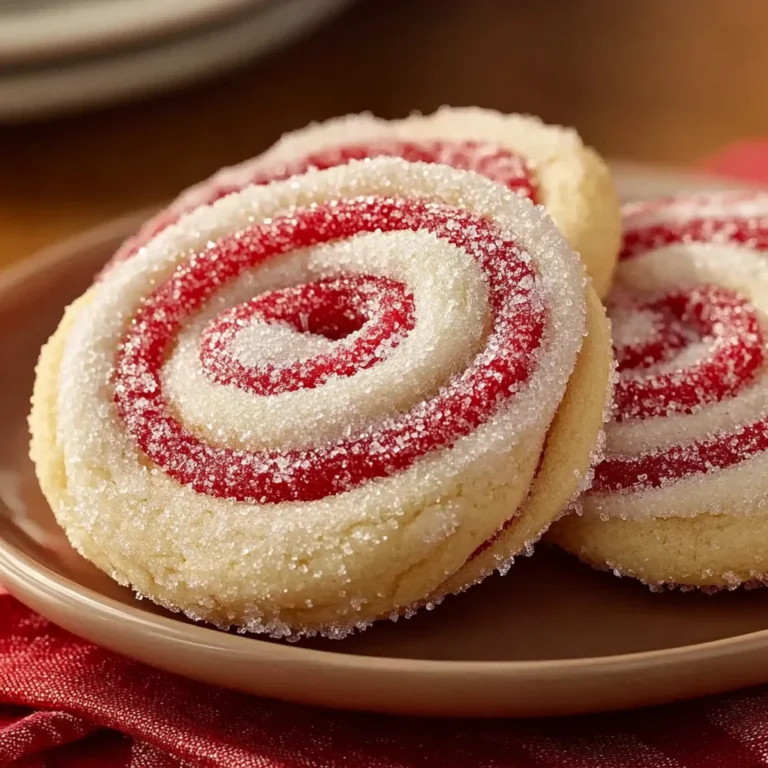
Slice and Bake Valentine’s Day Cookies
Remember those slice and bake cookies from your childhood that came in a tube? These homemade Slice and Bake Valentine’s Day Cookies are surprisingly easy to make, taste better than the original, and bring a touch of love to any occasion. Perfect for Valentine’s Day, or just when you want to brighten someone’s day, these cookies are colorful, delicious, and free from preservatives.
Why You’ll Love This Recipe
- Easy to Make – With simple steps and common ingredients, you can whip up these delightful cookies in no time.
- Customizable Colors – Use natural food coloring to create vibrant shades that fit any celebration or theme.
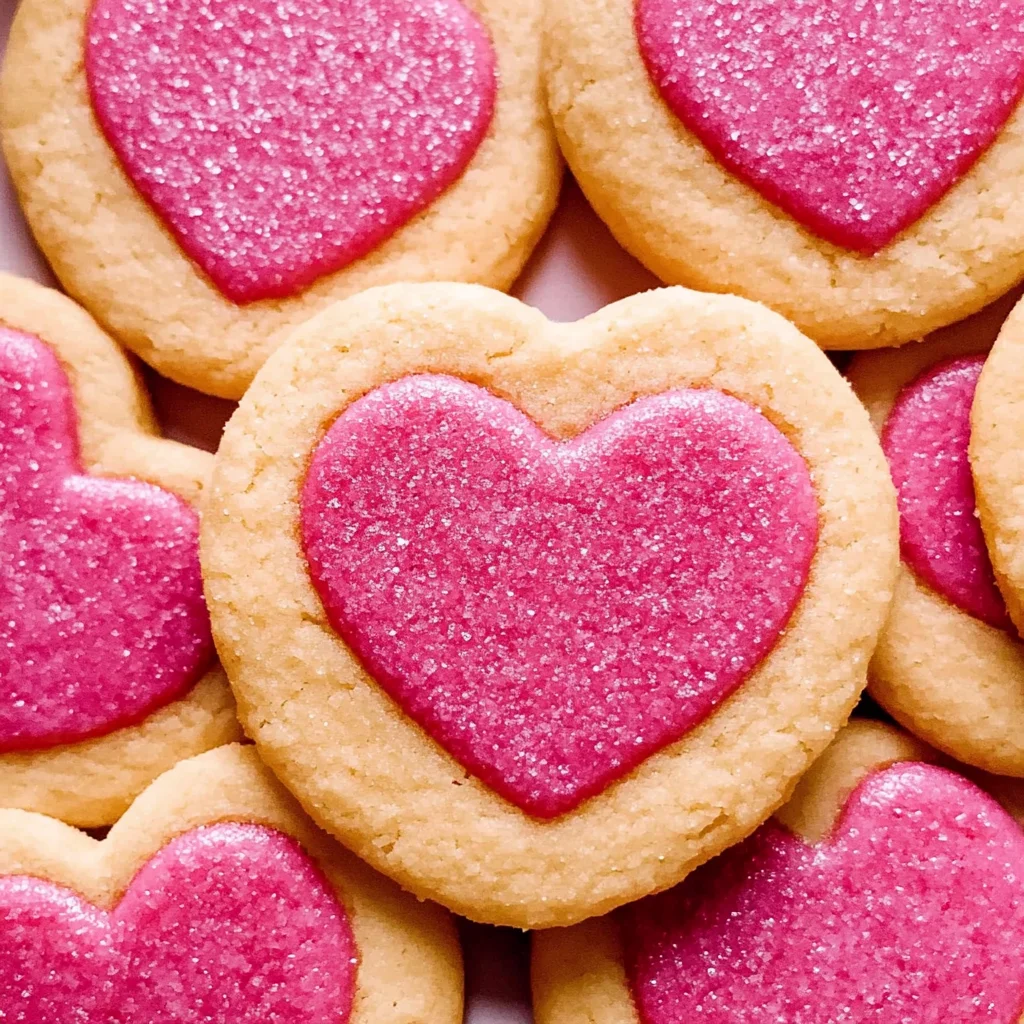
- Perfect for Sharing – These heart-shaped cookies are ideal for gifting to friends, family, or that special someone.
- No Preservatives – Enjoy the peace of mind that comes with homemade treats made from fresh ingredients.
- Fun for All Ages – Involve kids in the decorating process for a fun family activity.
Tools and Preparation
Before diving into the baking process, gather your tools and equipment. Having everything ready will make your experience smooth and enjoyable.
Essential Tools and Equipment
- Mixing bowl
- Stand mixer (optional)
- Measuring cups and spoons
- Whisk
- Plastic wrap
- Parchment paper
- Cookie cutter (small heart-shaped)
- Baking sheets
Importance of Each Tool
- Mixing Bowl – Essential for combining ingredients effectively; a large bowl allows you to mix without making a mess.
- Parchment Paper – Prevents cookies from sticking to the baking sheet and makes cleanup easy.
- Cookie Cutter – Helps create uniform shapes that look beautiful on any platter.

Ingredients
To make these delightful Slice and Bake Valentine’s Day Cookies, you’ll need the following ingredients:
- 3/4 cup unsalted butter, softened to room temperature
- 1 cup granulated sugar
- 1 teaspoon vanilla extract
- 2 large eggs
- 2 1/2 cups all purpose flour
- 1 teaspoon baking powder
- 1/2 teaspoon salt
- Red or pink food coloring (we used this natural food coloring)
How to Make Slice and Bake Valentine’s Day Cookies
Step 1: Cream Butter and Sugar
Add unsalted butter, granulated sugar, and vanilla extract to a large mixing bowl (or stand mixer).
1. Beat at medium speed until light and fluffy, about 3 minutes.
Step 2: Add Eggs
Add in the eggs, one at a time, mixing just until combined.
Step 3: Combine Dry Ingredients
In a separate bowl:
1. Whisk together the all-purpose flour, baking powder, and salt.
2. Gradually add this mixture to the wet ingredients in 3–4 batches until the dough comes together.
Step 4: Color the Dough
Remove about 1/2–2/3 of the dough and set it aside.
1. Add several drops of food coloring to the remaining dough and mix until combined.
2. Adjust with more food coloring as needed for desired hue.
Step 5: Chill Pink Dough
Place the pink dough in the freezer for 5 minutes.
1. Roll out into a rectangle about 1/2-inch thick on a lightly floured surface.
2. Return it to the freezer for 20 minutes.
Step 6: Cut Out Hearts
Using a small heart cookie cutter (roughly 1.5 across):
1. Cut out hearts from the chilled pink dough.
2. Lightly rub water on the floured side of each heart before adhering another heart on top.
Step 7: Form Logs
Repeat until you have a log about 10 inches long.
1. Return this log to the freezer for at least 30 minutes, or until frozen solid.
Step 8: Encase Hearts in Dough
Remove from freezer:
1. Press plain cookie dough directly onto and around the hearts, ensuring there are no gaps.
2. Roll into a smooth log.
Step 9: Chill Again
Wrap in plastic wrap:
1. Chill for at least another 30 minutes before baking.
Step 10: Preheat Oven
Preheat oven to 350˚F while preparing baking sheets lined with parchment paper.
Step 11: Bake Cookies
When ready:
1. Slice dough into rounds about 1/4” thick.
2. Space them about 2 inches apart on prepared baking sheets.
3. Bake for approximately 12 minutes or until bottoms are light golden brown.
4. Remove from oven and let cool completely before serving.
Enjoy creating these charming Slice and Bake Valentine’s Day Cookies!
How to Serve Slice and Bake Valentine’s Day Cookies
These delightful Slice and Bake Valentine’s Day Cookies are perfect for sharing or enjoying solo. Here are some creative ways to serve them that will make your treat even more special.
With a Glass of Milk
- A classic combination, serving these cookies with chilled milk enhances their sweetness and texture.
Decorated with Icing
- Add a touch of creativity by decorating the cookies with colorful icing. Use various colors for a festive look.
Accompanied by Fresh Berries
- Pair these cookies with fresh strawberries or raspberries. The tartness of the berries balances the sweetness of the cookies beautifully.
As Part of a Cookie Platter
- Arrange a variety of cookies on a platter for a stunning dessert display at any gathering. Mix in different shapes and flavors to offer guests choices.
Gift-Wrapped for Loved Ones
- Package these cookies in decorative boxes or bags tied with ribbons. They make thoughtful gifts for friends and family on Valentine’s Day.
How to Perfect Slice and Bake Valentine’s Day Cookies
Perfecting your Slice and Bake Valentine’s Day Cookies is all about technique and attention to detail. Follow these tips to ensure delicious results every time.
- Chill the Dough: Make sure to chill the dough thoroughly before slicing. This helps maintain their shape while baking.
- Use Quality Ingredients: Opt for high-quality butter and fresh eggs. This greatly affects the flavor and texture of your cookies.
- Don’t Skip the Baking Powder: Ensure you include baking powder to achieve that perfect rise and soft texture.
- Monitor Baking Time: Keep an eye on your cookies as they bake, as ovens vary. Remove them when they are lightly golden for best results.
- Store Properly: After cooling, store the cookies in an airtight container to keep them fresh longer.
Best Side Dishes for Slice and Bake Valentine’s Day Cookies
When serving Slice and Bake Valentine’s Day Cookies, consider these delightful side dishes that complement their sweetness perfectly.
- Fruit Salad: A refreshing mix of seasonal fruits adds natural sweetness and balances the rich flavors of the cookies.
- Yogurt Parfait: Layer yogurt with granola and fruits for a creamy side that pairs well with sweet treats.
- Cheese Platter: Include mild cheeses like brie or gouda; their creaminess contrasts nicely with cookie sweetness.
- Hot Chocolate: Serve warm mugs of hot chocolate, spiced with cinnamon or vanilla, for a cozy pairing.
- Nut Mix: A crunchy nut mix provides a savory contrast that enhances the cookie experience.
- Ice Cream: Vanilla or strawberry ice cream served alongside offers a delightful cold treat to enjoy with the warm cookies.
- Tea Selection: Offer various teas, such as chamomile or peppermint, which can cleanse the palate after sweet bites.
Common Mistakes to Avoid
When making Slice and Bake Valentine’s Day Cookies, it’s easy to make a few common mistakes. Here are some tips to ensure your cookies turn out perfectly.
- Ignoring the butter temperature: Using cold butter can lead to dense cookies. Always use softened butter for a light and fluffy texture.
- Overmixing the dough: Overmixing can result in tough cookies. Mix until just combined for the best results.
- Skipping the chilling step: Chilling the dough helps maintain cookie shape. Don’t skip this step; it’s crucial for perfect slices.
- Not measuring flour correctly: Too much flour can dry out your cookies. Use the spoon-and-level method for accurate measurement.
- Using too much food coloring: Overdoing it can alter texture and flavor. Start with a few drops and gradually add more until desired color is achieved.
Storage & Reheating Instructions
Refrigerator Storage
- Store in an airtight container for up to 1 week.
- Place parchment paper between layers of cookies to prevent sticking.
Freezing Slice and Bake Valentine’s Day Cookies
- Wrap tightly in plastic wrap or aluminum foil for up to 3 months.
- Label with the date so you know when to use them by.
Reheating Slice and Bake Valentine’s Day Cookies
- Oven: Preheat to 350°F and warm cookies for about 5 minutes.
- Microwave: Heat one cookie at a time on low power for about 10 seconds.
- Stovetop: Place cookies in a covered pan over low heat for a couple of minutes until warmed through.
Frequently Asked Questions
Here are some common questions people have about making Slice and Bake Valentine’s Day Cookies.
Can I use different colors of food coloring?
Yes, you can customize your cookies with various colors! Just ensure you don’t add too much, as that may affect texture.
How do I know when my cookies are done baking?
Look for light golden brown bottoms. The tops may remain pale, but they should not be shiny or doughy.
Can I freeze the cookie dough before baking?
Absolutely! Freezing the shaped log makes it easy to bake fresh cookies whenever you desire.
What can I use instead of food coloring?
You can use natural alternatives like beet juice or spirulina powder to achieve vibrant colors without artificial additives.
How should I store leftover baked cookies?
Keep them in an airtight container at room temperature for about a week or refrigerate them for longer freshness.
Final Thoughts
These Slice and Bake Valentine’s Day Cookies are not only fun to make but also incredibly versatile. You can experiment with different colors and shapes, making them perfect for any occasion. Give this recipe a try, and delight your loved ones with these sweet treats!
Slice and Bake Valentine’s Day Cookies

Indulge in the joy of baking with these delightful Slice and Bake Valentine’s Day Cookies. This easy-to-follow recipe lets you create heart-shaped cookies that are not only visually appealing but also bursting with flavor. Using simple ingredients, you can customize the colors to match any occasion, making them perfect for sharing with loved ones or simply treating yourself. These cookies are free from preservatives, offering a fresh taste that will remind you of childhood treats. Involve your family in the decorating process for a fun bonding experience as you bring a touch of love to every bite.
- Prep Time: 30 minutes
- Cook Time: 12 minutes
- Total Time: 42 minutes
- Yield: Approximately 24 cookies 1x
- Category: Dessert
- Method: Baking
- Cuisine: American
Ingredients
- 3/4 cup unsalted butter, softened
- 1 cup granulated sugar
- 1 teaspoon vanilla extract
- 2 large eggs
- 2 1/2 cups all-purpose flour
- 1 teaspoon baking powder
- 1/2 teaspoon salt
- Red or pink natural food coloring
Instructions
- In a mixing bowl, cream together unsalted butter and granulated sugar until light and fluffy.
- Add eggs one at a time, mixing until fully incorporated.
- In another bowl, whisk together flour, baking powder, and salt; gradually mix into the wet ingredients.
- Divide dough; color a portion with food coloring as desired.
- Chill the colored dough, then roll it out and cut heart shapes.
- Encase the hearts in plain dough to form logs and chill again.
- Preheat oven to 350°F and slice logs into rounds.
- Bake for about 12 minutes until lightly golden.
Nutrition
- Serving Size: 1 cookie (25g)
- Calories: 120
- Sugar: 6g
- Sodium: 45mg
- Fat: 6g
- Saturated Fat: 4g
- Unsaturated Fat: 2g
- Trans Fat: 0g
- Carbohydrates: 15g
- Fiber: 0g
- Protein: 1g
- Cholesterol: 20mg