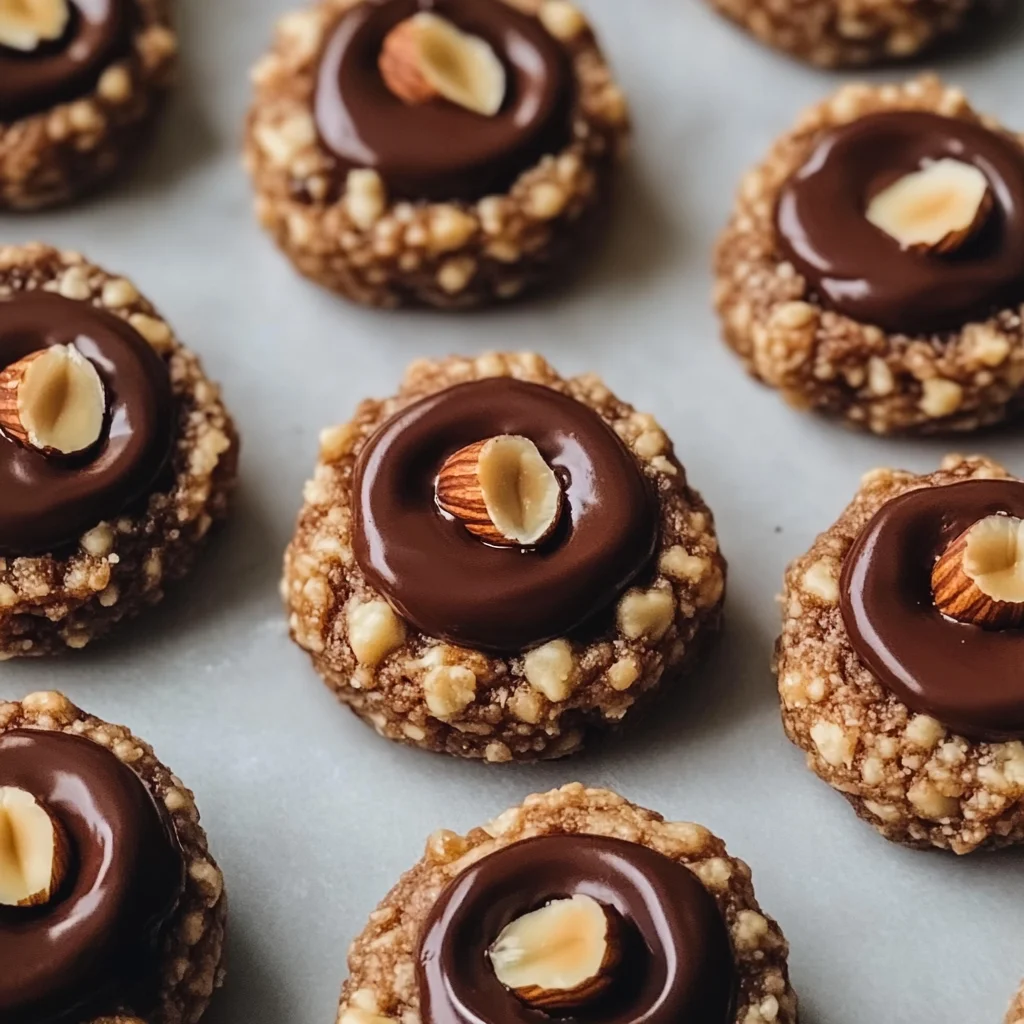
Chocolate Hazelnut Thumbprint Cookies Recipe
Chocolate Hazelnut Thumbprint Cookies Recipe are a delightful treat, perfect for any occasion. These cookies are not only easy to make but also offer a rich chocolate flavor complemented by the nutty goodness of hazelnuts. Their unique thumbprint design filled with chocolate hazelnut spread makes them a standout dessert that is sure to impress family and friends. Enjoy them as a sweet snack or gift them during festive gatherings!
Why You’ll Love This Recipe
- Quick and Easy: This recipe comes together in just over an hour, making it perfect for spontaneous baking.
- Delicious Flavor: The combination of chocolate and hazelnuts creates a rich, indulgent taste that everyone will love.
- Versatile for Occasions: Great for parties, holidays, or simply as a delightful treat at home.
- Giftable Treats: Package these cookies in a decorative box for a thoughtful homemade gift.
- Kid-Friendly Fun: Get the kids involved in shaping and filling the cookies for a fun family activity.
Tools and Preparation
Before diving into baking, gather your essential tools. Having everything ready will make the process smoother and more enjoyable.
Essential Tools and Equipment
- Electric mixer
- Mixing bowls
- Whisk
- Baking sheets
- Parchment paper
- Cookie scoop (optional)
- Wire rack
Importance of Each Tool
- Electric mixer: Saves time and effort when creaming butter and sugar together.
- Mixing bowls: Essential for keeping ingredients organized while you prepare your cookie dough.
- Baking sheets: Provide the right surface for even baking of your cookies.
Ingredients
For the Cookies
- 1 cup (2 sticks) unsalted butter, softened
- 2/3 cup granulated sugar
- 2 teaspoons vanilla extract
- 2 cups all-purpose flour
- 1/2 cup cocoa powder
- 1/2 teaspoon salt
For Rolling
- 1/2 cup hazelnuts, finely chopped (for rolling)
For Filling
- 1/2 cup chocolate hazelnut spread (such as Nutella)
- Extra whole hazelnuts for garnish (optional)
How to Make Chocolate Hazelnut Thumbprint Cookies Recipe
Step 1: Preheat the Oven
Preheat your oven to 350°F (175°C). Line two baking sheets with parchment paper to prevent sticking.
Step 2: Cream the Butter and Sugar
In a large mixing bowl, use an electric mixer to cream together the unsalted butter and granulated sugar. Beat until light and fluffy. Then mix in the vanilla extract.
Step 3: Combine the Dry Ingredients
In a separate bowl, whisk together the all-purpose flour, cocoa powder, and salt. This helps ensure even distribution of dry ingredients.
Step 4: Mix Dry Ingredients into Butter Mixture
Gradually add the dry mixture to the butter mixture. Mix until well combined; you should have a firm, pliable dough.
Step 5: Shape the Cookies
Roll the dough into balls about 1 inch in diameter. Coat each ball in finely chopped hazelnuts. Place them on prepared baking sheets, spaced about 2 inches apart.
Step 6: Create Indentations
Using your thumb or the back of a small spoon, press an indentation into the center of each cookie ball.
Step 7: Bake the Cookies
Bake in your preheated oven for about 12-14 minutes. The cookies should be set but not hard.
Step 8: Add Chocolate Filling
Once removed from the oven, re-press indentations if they puffed up during baking. Spoon about a teaspoon of chocolate hazelnut spread into each cookie’s center. Optionally, press a whole hazelnut into each spread for decoration.
Step 9: Cool and Serve
Allow cookies to cool on baking sheets for about 5 minutes before transferring them to a wire rack to cool completely. Enjoy!
How to Serve Chocolate Hazelnut Thumbprint Cookies Recipe
Serving your Chocolate Hazelnut Thumbprint Cookies is a delightful way to enhance any occasion. These cookies are not only delicious but also visually appealing, making them perfect for sharing with friends and family.
With a Glass of Milk
- Pair your cookies with a cold glass of milk for a classic combination that everyone loves.
As an Afternoon Snack
- Enjoy these cookies alongside a cup of tea or coffee during your afternoon break for a sweet pick-me-up.
At Parties or Gatherings
- Arrange them on a decorative platter at gatherings or parties to impress your guests and add a touch of sweetness to the festivities.
Gift Wrapped for Special Occasions
- Package the cookies in festive boxes or bags as thoughtful gifts for birthdays, holidays, or housewarming events.
With Ice Cream
- Serve warm cookies topped with a scoop of vanilla ice cream for an indulgent dessert experience.
How to Perfect Chocolate Hazelnut Thumbprint Cookies Recipe
Perfecting your Chocolate Hazelnut Thumbprint Cookies takes just a few simple tweaks. Follow these tips to ensure they come out delicious every time.
- Use Room Temperature Ingredients: Make sure your butter is softened and eggs (if using) are at room temperature to achieve the best texture.
- Don’t Overmix the Dough: Mix until just combined to keep the cookies tender and avoid toughening them.
- Chill the Dough: If the dough feels too soft, refrigerate it for 30 minutes before rolling it into balls to help maintain their shape while baking.
- Press Firmly for Indentations: Make sure to create deep indentations in the cookie balls so that there’s enough space for the chocolate hazelnut spread.
- Rotate Baking Sheets: Halfway through baking, rotate your sheets front to back to ensure even baking throughout.
- Store in an Airtight Container: Keep leftovers in an airtight container at room temperature to maintain freshness for several days.
Best Side Dishes for Chocolate Hazelnut Thumbprint Cookies Recipe
To complement your Chocolate Hazelnut Thumbprint Cookies, consider serving these delightful side dishes. They will enhance the overall experience and make your dessert table complete.
- Fresh Fruit Salad: A light and refreshing mix of seasonal fruits adds balance to the sweetness of the cookies.
- Cheese Platter: Include a variety of cheeses such as brie or goat cheese that pair wonderfully with chocolate flavors.
- Nutty Granola: Serve crunchy granola on the side as a snacking option that harmonizes with the nutty taste of hazelnuts.
- Yogurt Parfait: Layer yogurt with berries and granola for a delicious dessert that complements the chocolatey cookies.
- Chocolate Fondue: Set up a chocolate fondue station where guests can dip fruits or marshmallows alongside your cookies.
- Coffee or Espresso: Strong coffee or espresso provides a robust flavor contrast that enhances the richness of the cookies.
- Herbal Tea Selection: Offer various herbal teas, which can provide soothing notes that balance out the sweetness of each cookie.
- Ice Cream Sundae Bar: Create an ice cream sundae station where guests can build their sundaes using toppings like nuts, sprinkles, and syrups alongside your cookies.
Common Mistakes to Avoid
When making Chocolate Hazelnut Thumbprint Cookies, it’s easy to overlook some simple details that can affect the outcome. Here are common mistakes you should avoid.
- Not measuring ingredients accurately: Use precise measurements for flour and sugar to ensure the right dough consistency.
- Skipping the cooling time: Allow cookies to cool on the baking sheets before transferring them. This helps them set properly.
- Using warm dough: If your dough is too warm, the cookies may spread too much while baking. Chill it for a short time if needed.
- Overbaking the cookies: Keep an eye on the time; underbaked cookies will be soft, but overbaking leads to dryness. Aim for a light golden color.
- Not re-pressing indentations: After baking, if indentations have puffed up, don’t forget to re-press them for optimal filling capacity.
Storage & Reheating Instructions
Refrigerator Storage
- Store in an airtight container for up to 1 week.
- Place parchment paper between layers of cookies to prevent sticking.
Freezing Chocolate Hazelnut Thumbprint Cookies Recipe
- Freeze for up to 3 months in an airtight container or freezer bag.
- Separate layers with parchment paper for easy access.
Reheating Chocolate Hazelnut Thumbprint Cookies Recipe
- Oven: Preheat to 350°F (175°C) and heat cookies for about 5 minutes until warm.
- Microwave: Heat each cookie individually for about 10-15 seconds on low power.
- Stovetop: Place cookies in a pan over low heat, covering with a lid until warmed through.
Frequently Asked Questions
Here are some commonly asked questions about the Chocolate Hazelnut Thumbprint Cookies Recipe.
How long do Chocolate Hazelnut Thumbprint Cookies last?
These cookies can last up to one week in the refrigerator or up to three months in the freezer when stored properly.
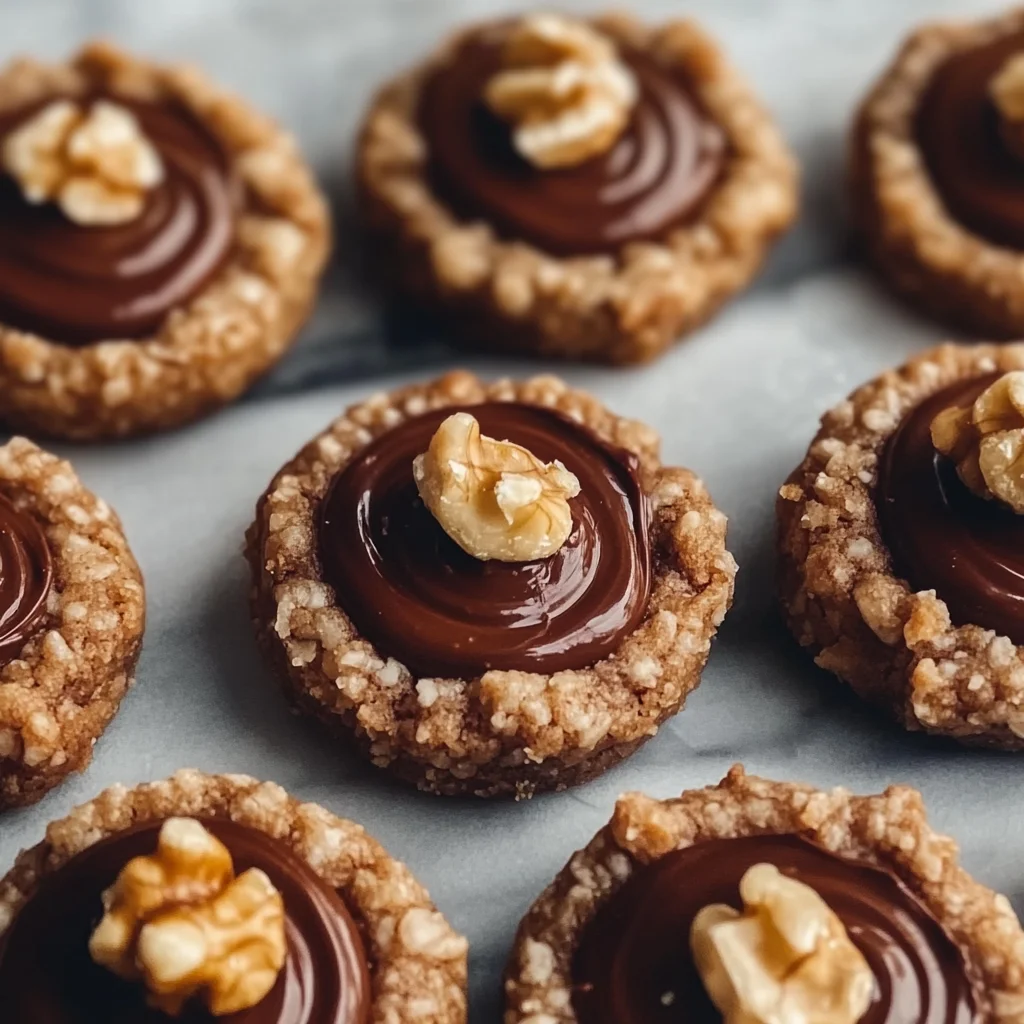
Can I use other nuts instead of hazelnuts?
Yes! Feel free to substitute hazelnuts with almonds or walnuts for a different flavor profile in your thumbprint cookies.
What is the best way to store these thumbprint cookies?
Store them in an airtight container at room temperature or refrigerate them for longer freshness.
Can I make these cookies gluten-free?
Absolutely! Use a gluten-free all-purpose flour blend as a substitute for regular flour in this recipe.
How many servings does this Chocolate Hazelnut Thumbprint Cookies Recipe yield?
This recipe yields about 20 delicious thumbprint cookies, perfect for sharing!
Final Thoughts
The Chocolate Hazelnut Thumbprint Cookies Recipe offers a delightful combination of flavors and textures that everyone will love. They are versatile and can be customized with various fillings or toppings. Try experimenting with different nuts or spreads to find your perfect match! Enjoy baking these treats and sharing them with friends and family.
Chocolate Hazelnut Thumbprint Cookies

Indulge in the deliciousness of Chocolate Hazelnut Thumbprint Cookies, a delightful treat that combines rich chocolate flavor with the nutty essence of hazelnuts. These cookies are perfect for any occasion, whether you’re hosting a gathering or simply enjoying a sweet snack at home. Their charming thumbprint design filled with creamy chocolate hazelnut spread makes them a standout dessert that is both visually appealing and irresistibly tasty. Easy to make, they also offer an excellent opportunity for family bonding as you shape and fill these delightful cookies together. Gift them beautifully packaged or serve them warm with ice cream for an indulgent experience.
- Prep Time: 20 minutes
- Cook Time: 14 minutes
- Total Time: 34 minutes
- Yield: Approximately 20 cookies 1x
- Category: Dessert
- Method: Baking
- Cuisine: American
Ingredients
- 1 cup (2 sticks) unsalted butter, softened
- 2/3 cup granulated sugar
- 2 teaspoons vanilla extract
- 2 cups all-purpose flour
- 1/2 cup cocoa powder
- 1/2 teaspoon salt
- 1/2 cup hazelnuts, finely chopped (for rolling)
- 1/2 cup chocolate hazelnut spread
Instructions
- Preheat your oven to 350°F (175°C) and line two baking sheets with parchment paper.
- In a mixing bowl, cream together softened unsalted butter and granulated sugar until light and fluffy. Blend in vanilla extract.
- In another bowl, whisk together all-purpose flour, cocoa powder, and salt. Gradually add this mixture to the butter mixture until combined.
- Roll the dough into 1-inch balls, coat in finely chopped hazelnuts, and place on prepared baking sheets.
- Create indentations in each cookie using your thumb, then bake for 12-14 minutes.
- After baking, re-press indentations and fill each with chocolate hazelnut spread. Let cool before serving.
Nutrition
- Serving Size: 1 cookie (25g)
- Calories: 120
- Sugar: 7g
- Sodium: 50mg
- Fat: 8g
- Saturated Fat: 4g
- Unsaturated Fat: 3g
- Trans Fat: 0g
- Carbohydrates: 10g
- Fiber: 1g
- Protein: 2g
- Cholesterol: 15mg